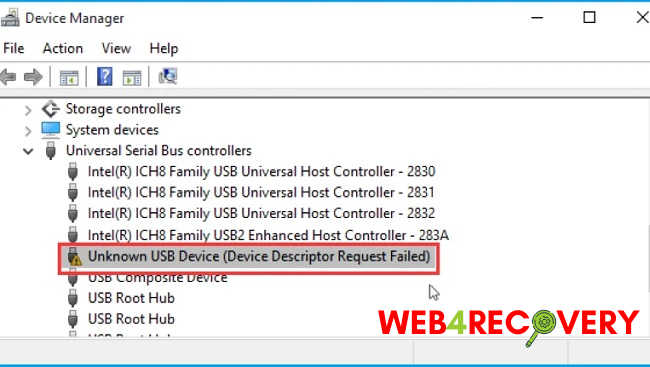
Common among Windows users, the Device Descriptor Request Failed problem is currently plaguing your device. Simply said, the name of your device in Device Manager will be replaced by “Unknown USB Device (Device Descriptor Request Failed)”.
However, this notification is harmless because the device will still function properly (in most cases). This mistake occurs in three different scenarios.
Method 1: Pause Booting Quickly
Turning off Windows’ rapid boot feature is a common workaround for users with this issue. This is primarily due to the fact that the rapid boot actually boots your system very quickly, leaving little time for your gadgets to install correctly.
- Preserve the Windows key while pressing R
- Enter powercfg.cpl and hit enter.
- Select Set the functions of the power buttons.
- To alter unavailable options, click the corresponding button.
- Do not choose the item labelled Enable rapid startup (recommended). Location: Shutdown settings
- Select the “Save changes” button.
See if the issue persists after a system reboot to determine if it was fixed.
Read Also:
Method 2: USB Power Saving Mode Off
To prevent Windows from turning down your device, you can disable USB Power Saving functions inside Windows. Many people have found success using this method.
To disable USB Power Savings, please proceed as described below.
- Keep holding the Windows key and hit R.
- Press Enter after typing devmgmt.msc.
- Find the gadget that’s giving you the error. Click the gear icon, then choose Properties.
- To access the Power Management menu, select it.
- Deselect the box labelled To conserve energy, please let the computer power down this gadget.
- Just go ahead and hit the OK button.
Once that’s out of the way, follow the instructions below.
- Press and hold the Windows key, and then press R.
- Put in “powercfg.cpl” and hit “enter.”
- Select Modify Plan Options to alter your current coverage. Each strategy ought to begin with this possibility. Choose whether your current strategy is balanced or high performance here.
- Select Advanced Power Options, then click Change.
- Just double-click the USB options.
- To suspend a device selectively through USB, double-click the related icon.
- Neither the On Battery nor the Plugged in settings should be active. If they are active, you can turn them off by going to the Enable tab, then choosing Disable.
- It’s as simple as clicking the “Apply” button, then “Ok”
- Click Save Changes
Method 3: EnhancedPowerManagement Implemented by Use of the Registry Editor
Your device’s power management can be disabled in the registry editor as well. However, this is somewhat convoluted, it may be the answer to your problem.
Read the instructions carefully and carry them out as shown.
- When you want to run a programme, hit the Windows key + R.
- Hit the enter key after typing devmgmt.msc.
- Select the USB controller and double-click it.
- Put your gadget in the “2x” position.
- The Details Can Be Seen By Selecting This Tab.
- From the drop-down option, choose the path to the device instance.
- Choose “Copy” from the context menu after right-clicking the value displayed under “Value.”
- Windows + R = Holding the Keys
- Simply enter regedit.exe and hit the enter key to launch the Registry Editor.
- Proceed down this road Specifically, it should be located in HKEY LOCAL MACHINESYSTEMCurrentControlSetEnumDevice Instance Path>. A Device’s Settings. If you’re unsure of how to get here, just follow the directions provided.
- Go to the left pane and double-click HKEY LOCAL MACHINE.
- Choose SYSTEM from the left menu and then double-click it.
- The CurrentControlSet can be accessed by double-clicking its entry in the left pane.
- Find Enum on the left pane and double-click it.
- Find “Device Instance Path” in the list on the left, and double-click it. Keep in mind that the path you copied in Step 7 above is referred to as Device Instance Path>. Instead of a single digit, the device instance route will look like USBSome NumberMore Numbers. Take care to walk in the right direction.
11. Select the Device Parameters menu item.
12. If there is no content in the right pane, right-click there and choose New.
13. Value Type: DWORD (32 bits)
14. Define the significance EnhancedPowerManagementEnabled
15. To disable EnhancedPowerManagementEnabled, double-click the setting and enter 0. Then, you can proceed by selecting the Ok button.
Try again connecting the device after restarting the computer.
Read Also:


 Error")


