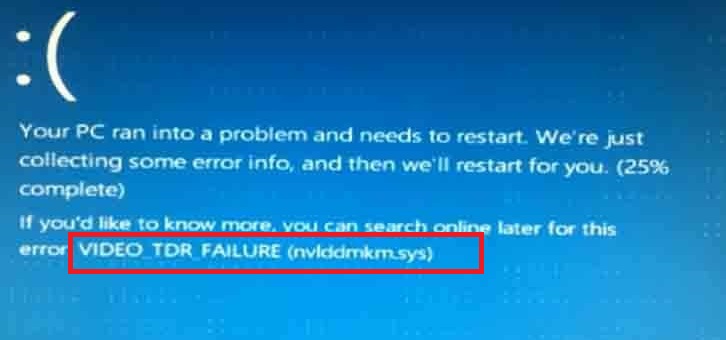
You are worried about the Video_TDR_Failure (nvlddmkm.Sys) error on your Windows 10 system? No need to worry anymore. We have got an article right here to address your problem — the ‘nvlddmkm.Sys‘ or also known as ‘video TDR-failure‘ error on your Windows 10 system is a widespread error. Many users have been facing the similar kind of error on their Windows 10 system. Even though it is a commonly occurring error, it can interfere with the user experience in many ways.
The ‘nvlddmkm.Sys‘ error usually causes the computer screen to turn completely blue and is followed by a complete system shut down. The error is prominent in Windows Operating System versions 7 and above. Solving any problem by its roots ensures the permanent solution. Although, you need to know the actual reason leading to the error to get rid of the error permanently.
Some of the common causes of the ‘nvlddmkm.Sys‘ error in your Windows operating system are a faulty graphics card driver, the conflict between programs, graphic card overload or an issue with the RAM.
How To Fix Nvlddmkm.Sys Error on Windows 10
Here are six quick methods worth trying to solve the ‘Video_TDR_Failure (nvlddmkm.Sys)‘ error in your Windows operating system.
Method 1 – Remove Conflicting Programs
The Video_TDR_Failure (Nvlddmkm.sys) error may be occurring due to a recent program installation in your system. Restoring the system back to a date when it was functioning well will help solve Video_TDR_Failure issue. Also, removing that recent program can be helpful too.
If it was the error due to a faulty program, it must have been fixed. In case the error is still popping up, try the next fix.
Method 2 – Run A Disk Check on Your System
A faulty disk is another common cause of the ‘nvlddmkm.Sys‘ error. Running a disk check is a prominent solution for the problem if the cause is a faulty disk. However, running a disk check involves the risk of losing some of your data. So, make sure to back up your crucial data to avoid any such data loss.
Follow the Steps Given Below to Run A Disk Check on Your System:
Step 1 – Press the ‘Windows‘ key and ‘X‘ together to open a dialogue box. Then, click on the command prompt option.
Step 2 – Choose run as administrator and type in the following command: chkdsk /f c:
Step 3 – Press the Enter key. The system will now ask for permission to run a check at the next booting. Type Y and press Enter.
Step 4 – Exit the Command Window and Restart the computer system.
Step 5 – Once the disk checking process is complete, the prevalent errors will be displayed. Now, Rectify the Errors using suitable techniques.
If it were the disk faults causing the problem, then this method should have solved the issue; however, if the issue is still prevalent try the next fix.
Method 3 – Run A Memory Check on The System
An issue with the RAM could be a possible cause for the error popping up again and again. A memory check of the RAM is a prominent solution in this case.
Follow the steps given below to run a memory check on your Windows system:
Step 1 – Press the ‘Windows‘ key and ‘R‘ together to open the run command dialogue box.
Step 2 – Type ‘mdsched.exe’ in the run command dialogue box and press OK.
Step 3 – Choose between Restart now and check for problems (recommended) or check for problems the next time I start my computer.
Step 4 – Once the memory check is complete, errors will be displayed. Rectify the Errors using suitable techniques.
If the error is not popping up again, the issue was concerned with RAM only. In case the issue is still prevalent try the next method.
Method 4 – Re-Install Graphics Card Driver
One of the major causes behind the ‘nvlddmkm.Sys‘ error is a faulty graphics card driver. The NVIDIA graphics card has shown this issue in most of the cases. Thus, reinstalling the graphics card driver seems a perfect solution in this scenario.
Follow the steps given below to reinstall your graphics card driver:
Step 1 – Start your computer system and press the power button to turn off your computer. Then, hold the power button key until your computer system shuts down automatically. Repeat this step until you see the ‘Preparing Automatic Repair‘ option below.
Step 2 – You will see the options after some time. Once the options appear, click on Advanced Options.
Step 3 – Now, select the Troubleshoot Option from choosing an option menu.
Step 4 – Choose Advanced Options on the troubleshoot screen.
Step 5 – Then, select Startup Settings and click on the Restart button at the right bottom of the screen.
Step 6 – Press the F4 key if you want to enter into safe mode without a network and press the F5 key if you’re going to enter into safe mode with networking.
Step 7 – The system has now booted in the safe mode. Now, press the ‘Windows key‘ and ‘X‘ together to open a dialogue box. Then, click on the Device Manager.
Step 8 – Now, expand the Display Adapters tab. Then, right-click on NVIDIA Graphics Driver and choose to Uninstall it.
Step 9 – Now, click on OK in the prompt window and check to delete the driver software for the device before that.
Step 10 – Then, Download and Install the latest version of the driver again.
Step 11 – Now, navigate to the following address ‘C:\Windows\System32\Drivers‘ and find nvlddmkm.sys. Then, right-click on it and rename it to nvlddmkm.sys.old.
Step 12 – When prompted for confirmation, press, OK.
Step 13 – Find the NVIDIA folder in C drive of your computer system. Then, copy and paste nvlddmkm.sy_ File to the desktop.
Step 14 – Now, open the Command Window and type in expand.exe nvlddmkm.sy_ nvlddmkm.sys
Step 15 – Navigate to the C drive and copy the newly created nvlddmkm.sys file.
Step 16 – Now, paste the copied file into the ‘C:\Windows\System32\Drivers‘ folder and restart your system.
If the error does not pop up again after the boot, the problem was with the graphics card driver and reinstalling it worked, however, if the problem is still prevalent try the next method to deal with the issue.
Method 5 – Update Your Windows
Microsoft maintains its duty as a tech giant and makes sure to release new updates of Windows every month to help its system function better every day.
These updates increase the efficiency of Windows and thus it is important to update your Windows computer to its latest version from time to time. Failure in updating your Windows system can lead to various system errors, slow and inefficient functioning and vulnerability to various malware and threats.
There is a possibility that the nvlddmkm.sys error was occurring due to an outdated Windows system. Enable the Windows automatic updates to keep your computer system well updated and avoid such potential threats.
Follow the Steps Given Below to Check for the Available Updates:
Step 1 – Press the ‘Windows‘ key and ‘I‘ together to open Windows setting directly, or you can open it by navigating to settings too.
Step 2 – Find the Update and Security option and click on it.
Step 3 – Then, select Windows Update Tab from the left pane and click on check for updates option. Now the updates will be installed automatically.
Step 4 – Once the updates are installed, Restart Windows.
Bingo! Hopefully, you have finally fixed the nvlddmkm.sys error.
Method 6 – Change The Graphics Card
Sometimes, your games or applications running in your system may overload the graphics card. It can thus cause the nvlddmkm.sys error. Changing the graphics card with the one suited for the application can curb the nvlddmkm.sys error.
Conclusion
The key to solving the Nvlddmkm.sys problem is finding the cause. You can quickly solve the problem in no time by identifying the reason for the error. A few simple methods were enough to take away your worries, and now you can enjoy a well-functioning computer system again.


 Error")


