It’s no secret that Player Unknown’s Battlegrounds (also known as PUBG) is one of the most popular and successful battle royale games available right now. This game has been a huge hit thanks to its consistent updates and innovative mechanics.
There has been a rise in the number of games that aim to imitate PUBG, but none have come close to matching its success. In a game with such a high potential for addiction, it’s frustrating to run across a common problem and be at a loss for a solution. Stop worrying; we’ll show you how to rejoin the action right away!
Online multiplayer battle royale games like PUBG (PlayerUnknown’s Battlegrounds) have taken the gaming world by storm.
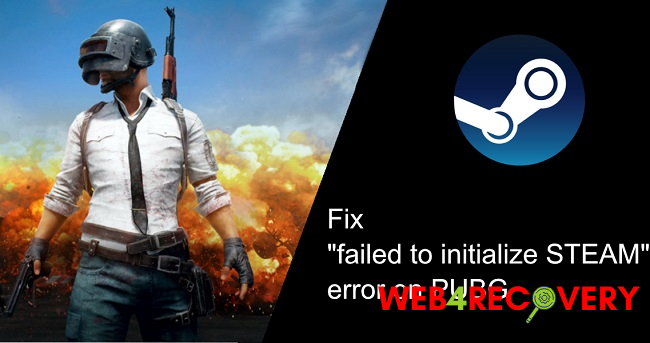
As players from across the globe log in for their daily dose of adrenaline-pumping action, a common error message occasionally halts their progress: “Failed to Initialize Steam”.
Let’s dive into this issue, understand its origins, and explore solutions to get you back in the game.
What is PUBG “Initialize Steam”?
When you launch PUBG, the game seeks to connect with Steam, a digital distribution platform. This connection ensures authentication of your game copy and enables features like multiplayer mode, in-game purchases, and more. The process of this connection and verification is what’s referred to as “Initialize Steam”.
What Causes the “Failed to Initialize Steam” Error?
Several factors could trigger this error:
- Server Issues: Sometimes, PUBG or Steam servers might be down for maintenance or facing unexpected outages.
- Corrupted Cache: Over time, cache files can get corrupted, leading to various errors.
- Outdated Game/Steam Client: Running an outdated version of the game or the Steam client can result in compatibility issues.
- API Issues: A malfunctioning Steam API can disrupt the connection between PUBG and Steam.
Why Do I Keep Getting a “PUBG Failed to Initialize” Message?
According to PUBG’s help desk, you’ll see this message if the game wasn’t installed correctly. Permitted permissions to the game files, bugged Steam (very unusual), an incomplete installation, out-of-date graphics drivers, etc. all contribute to this problem.
Method 1: Limiting Governmental Authority
In cases like yours, this is the most typical and reliable answer. There has been a widespread claim that removing the game files’ administrative privileges fixed the problem. As a means of accomplishing this:
- Locate the Steam folder on your computer; often this will be C:Program Files (x86)Steam or C:Program FilesSteam.
- Go to your Steam directory and then go to
steamapps\common\TslGame\Binaries\Win64\.
3. Find the Tslgame.exe file in that directory.
4. Select its properties by right-clicking on it.
5. Make sure that “Run as Administrator” is not selected in the Compatibility tab.
Method 2: Getting Back Up to Speed
The issue is caused by Steam, and it occurs at odd times. You need only:
- Give up the game.
- Invoke Task Manager by right-clicking the taskbar.
- Use the Processes tab of Task Manager.
- Check for Steam and TslGame processes and terminate them all.
- Boot up Steam again and open your game.
Method 3: Improving Performance by Keeping Your Drivers Current
Drivers that haven’t been updated in a long time are another possible culprit. You should keep an eye out for upgrades for your graphics card from AMD or Nvidia. How to Check for Driver Updates
- The Device Manager can be accessed by right-clicking “My Computer” in the Dock.
- To update the drivers for your graphics card, go to Display Adapters, then right-click on it and select “Update Driver Software.”
- Then, select “Automatically determine when new driver software is available”
Even if your computer doesn’t update your driver automatically, grabbing the most recent version from the manufacturer’s site and installing it is a breeze.
Method 4: Game Authenticity Verification
Broken or corrupted game files could be at the root of the issue. You can check your game files using steam whenever you suspect they may be corrupted. This can be achieved by doing the following:
- Launch Steam, and navigate to the Library.
- Clicking right on PUBG will provide other options. Proceed to the Properties menu.
- Select “Verify integrity of game files” from the Local Files menu to check the status of your game’s files.
- You must wait for it to finish checking your game files. Play your game again after it’s finished.
Method 5: Steam reinstallation
If none of the previously recommended solutions work, you may need to reinstall Steam. You should be all set now that this issue has been resolved. Simply to Steam’s website, download the file, and run the setup wizard.
- To open the Programs and Features Snap-in, hit the Windows key plus R, then type “appwiz.cpl” and hit Enter.
- Finding Steam’s entry in the application manager. Uninstall it by right-clicking on it. (The uninstaller can also be run from Steam’s folder.)
- Reboot your computer and install Steam again from scratch.
Is PUBG Servers Down?
One of the first things to check when facing this error is the status of PUBG servers. Websites like DownDetector can provide real-time status and outage maps.
How Do I Reset My Steam API?
If you suspect the issue might be with the Steam API:
- Navigate to your Steam directory.
- Look for the ‘Steam.dll’ file and delete it.
- Restart Steam. It will automatically fetch and install the missing .dll file, effectively resetting the API.
What is “Error During Initialization” on Steam?
This is a broader error than the one PUBG players typically face. It implies that Steam couldn’t initialize a game for some reason, which could range from corrupted game files to software conflicts. It’s a generic error that can affect any game on the Steam platform.
How to Clear PUBG and Steam Cache?
Clearing the cache can often rectify a myriad of issues, including initialization errors.
For PUBG:
- Navigate to the game directory.
- Find and enter the ‘TslGame’ folder.
- Proceed to ‘Saved’ -> ‘Config’ -> ‘WindowsNoEditor’.
- Delete the contents of this folder.
For Steam:
- Exit the Steam client.
- Navigate to your Steam directory.
- Delete the ‘appcache’ folder.
- Restart your PC and then launch Steam.
Note: This won’t delete your games but might require you to log into Steam again.
Conclusion:
The “Failed to Initialize Steam” error on PUBG can be quite frustrating, especially when you’re geared up for a match. However, with a clear understanding of its origins and potential solutions at your disposal, the downtime can be minimized.
As always, regular updates and maintenance of both the game and the Steam client will ensure a smoother gaming experience. Happy gaming!


 Error")


