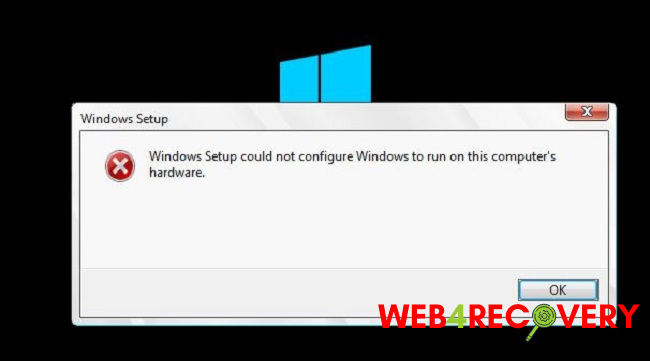
There are numerous error messages that would frustrate any user. You can tell this one is different from the rest because the error message says you can’t even install Windows.
Windows, being the prevalent operating system that powers billions of devices, relies heavily on seamless integration with a wide range of hardware configurations.
However, there are moments when users face challenges like “Windows Setup Could Not Configure Windows To Run on This Computer’s Hardware.” In this detailed guide, we’ll demystify this error, its causes, and the solutions to combat it.
What is Windows Setup Hardware?
Windows Setup Hardware refers to the process and tools through which the Windows operating system identifies, communicates with, and sets up on the computer’s hardware components.
This includes the CPU, RAM, storage devices, GPU, and other peripherals. Proper configuration ensures optimal performance and stability.
Causes of “Windows Setup Could Not Configure Windows To Run on This Computer’s Hardware” Error
This error typically appears during the OS installation process. Several triggers can cause this:
- Incompatible Drivers: The Windows installation might be trying to use a driver that’s not compatible with your hardware.
- Faulty Hardware: Malfunctioning components, especially storage devices, can interrupt the setup process.
- Outdated BIOS/UEFI: An outdated motherboard firmware might not support certain OS features or configurations.
- Mismatched Disk Configurations: Differences in disk setups, like switching between AHCI and RAID, can cause this error.
Method 1: Adjustments Made To The Command Prompt
It’s remarkable how something as simple as this modification can be so tough to conceive of, yet it’s helped countless users who had been struggling with this error message for months.
If you run the fix the first time you get the error when merely beginning the Windows installation process, you should be able to proceed without further incident.
Step 1: If you get the notification while the Windows installation discs are still plugged in, you can open a Command Prompt window by pressing Shift + F10.
Step 2: Please enter each of the following commands and press Enter afterward:
CD C:\windows\system32\oobe
msoobe
Step 3: Determine if you are once again in a position to proceed with the procedure.
Method 2: Tweak the BIOS Settings
There are a number of potential causes for this issue, but one of the most common is that some BIOS settings, while optimal for earlier versions of Windows, typically lead to this error when utilised with Windows 10. To resolve this, please implement the procedures outlined below.
Step 1: To shut down your computer, select Start, then Power, then Shut down from the menu.
Step 2: Try powering on the computer once more while holding down the BIOS key to access the setup utility. On the boot screen, it will usually indicate “Press __ to enter Setup,” which is the BIOS key.
The most frequent messages are not the only ones. Standard BIOS function keys include F1, F2, Del, Esc, and F10. Be aware that the notification fades really quickly, so if you miss it you will have to restart to try again.
Step 3: There is no universal standard for the location of the SATA setting; different BIOS firmware tools from different manufacturers will have it under different tabs. It could be in the “Onboard devices” section, “Integrated Peripherals,” or “Advanced.” In any case, the function in question is referred to as SATA operation.
Step 4: You can switch between AHCI, RAID, ATA, or IDE after you find the appropriate options. When it comes to updating or upgrading, ATA is your best bet. Choose Exit, Save, and Exit from the menu that appears. The kicking process will continue now. Please try to re-launch the updating process.
Step 5: After you’ve successfully installed Windows 10 and finished the procedure, remember to return the settings to their original values.
Method 3: Please Desist From Overclocking Your CPU
These errors are commonly brought on by overclocking your processor, and this has been proved by numerous users whose PCs began to have issues after they overclocked. When you overclock, you increase the processor’s frequency and clock speed beyond their stock limits.
There have been cases where entire PCs have gone down in fire after users overclocked them too much or were negligent, so while this can provide your PC a huge speed advantage, you must exercise extreme caution.
Which programme you used to overclock your CPU in the first place will determine how you reset it to its factory settings. Overclocking software from both Intel and AMD can be found online, but there are plenty of other options if you want to quit overclocking.
How to Boot in Safe Mode
Safe Mode is a diagnostic startup mode in Windows that can help troubleshoot issues:
- Restart your computer.
- Press the F8 key repeatedly before the Windows logo appears.
- This will bring up the “Advanced Boot Options” menu.
- Use the arrow keys to select “Safe Mode” or “Safe Mode with Networking” (if you need internet access).
- Press Enter.
For Windows 10/11 users:
- Hold down the Shift key and click the “Restart” option from the Start menu or login screen.
- After your PC restarts, choose “Troubleshoot” > “Advanced options” > “Startup Settings” > “Restart”.
- Upon reboot, select the version of Safe Mode you want to enter.
How Do I Remove Windows Installation Error?
If you encounter an installation error:
- Check Hardware Compatibility: Ensure all components, especially the storage devices, are in good health and are compatible with the Windows version you’re installing.
- Update BIOS/UEFI: Visit your motherboard manufacturer’s website and follow guidelines to update the firmware.
- Use a Different Installation Media: The USB/DVD you’re using might be corrupted. Consider creating a new bootable installation media.
- Disk Configuration: Boot into your BIOS/UEFI and check the disk configuration (AHCI/RAID). Switching configurations might resolve the issue.
How Do I Fix Windows Not Booting from SSD?
If Windows isn’t booting from an SSD:
- Set SSD as First Boot Priority: Enter BIOS/UEFI settings and ensure the SSD is set as the primary boot device.
- Check SATA Cables: Ensure the SSD’s SATA cables are securely connected.
- Update SSD Firmware: Visit the SSD manufacturer’s website and download any firmware updates.
- Repair Master Boot Record (MBR): Use Windows installation media to boot and access the command prompt. Use commands like
bootrec /fixmbrandbootrec /fixbootto repair the MBR. - Clean Installation: As a last resort, backup your data and perform a clean Windows installation on the SSD.
In Conclusion
While Windows strives to be user-friendly and compatible with a plethora of hardware configurations, occasional hitches are inevitable.
Armed with the right knowledge and a bit of patience, most of these challenges can be easily overcome, ensuring a smooth and responsive computing experience.


 Error")


