Temporary files, also known as temp files, are created by Windows and other applications to store data temporarily. These files can accumulate over time, consuming a significant amount of storage space.
In this article, we delve into the locations of temporary files in different Windows versions, why they can become enormous, and how you can delete them, particularly in Windows 7, automatically.
Most Windows users have come across the term “Temporary Folder” or “Temp Folder” at some point, but not everyone understands its significance or how to manage it effectively.
In this article, we’ll dive deep into the Temporary Folder in Windows 7, addressing its uses, safety concerns, and some common questions about its maintenance.
What is a Temporary Folder?
In Windows operating systems, the Temporary Folder is a designated directory used by the system and various applications to store temporary files. These files could be intermediate document versions, logs, caches, or any data that is essential for a short period but not required long-term.
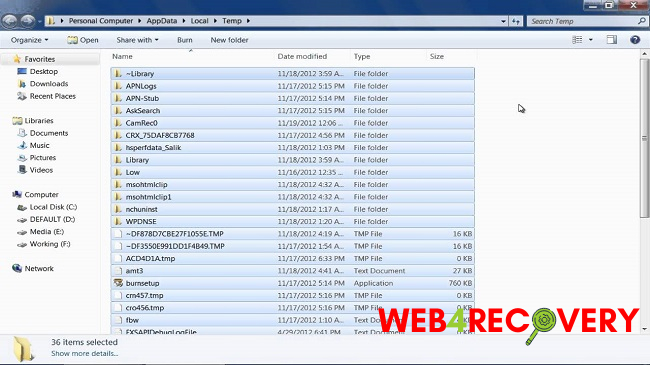
Temporary Files Folder Location in Windows
Windows 7 and Windows 8
In both Windows 7 and Windows 8, the location of the temporary files folder is typically in the same place. You can access this folder by following these steps:
- Press the “Windows + R” keys to open the Run dialogue box.
- Type “%temp%” and press Enter.
This command opens the temporary files folder for the current user. These files are generally safe to delete as they are created for temporary use only.
Windows 10
In Windows 10, you can also access the temporary files folder by typing “%temp%” in the Run dialogue box.
Word Temporary Files in Windows 10
Microsoft Word creates temporary files as a backup measure when you’re working on a document. The location of Word’s temporary files in Windows 10 is a little trickier to find. Follow these steps:
- Open Word, click on “File,” then “Options.”
- In the “Options” window, click “Save.”
- You will find the auto-recovery file location here. This is where Word saves its temporary files.
Temporary Files Becoming Huge
Temporary files can become quite large over time, mainly because they are not always deleted when they’re no longer needed. Applications and Windows might fail to remove these files due to system crashes, unexpected shutdowns, or software bugs.
For instance, if a program is closed improperly, it might not get the chance to delete its temporary files. Over time, these undeleted files can accumulate, occupying significant storage space.
How do I Recover Temporary Files in Windows 7?
If you’ve lost a document or file but suspect it might still reside in the Temp folder, here’s how you recover it:
- Press
Windows + Rkeys simultaneously to open the ‘Run’ dialogue. - Type
%temp%and hit Enter. This command navigates you directly to the Temporary Folder. - Browse through the files to locate the one you want to recover. Temporary files often have non-descriptive names, so you might need to check several.
- Once found, copy and save the file to a safer location and rename it if necessary.
How to Delete Temporary Files
It’s essential to clean out your temp files regularly to free up disk space and keep your PC running smoothly.
Windows 7
In Windows 7, you can use the built-in Disk Cleanup tool to delete temporary files automatically. Here’s how:
- Click on the “Start” button and in the search box, type “Disk Cleanup.”
- Select the drive you want to clean.
- Check “Temporary files” and any other file types you want to delete, then click “OK.”
Windows 8 and Windows 10
For Windows 8 and Windows 10 users, the process is slightly different:
- Press the “Windows + I” keys to open the Settings app.
- Click on “System,” then “Storage.”
- Under “Local Disk (C:),” click on “Temporary files.”
- Select the temporary files you want to delete, then click “Remove files.”
Deleting temporary files can help maintain your system’s performance. However, always remember to be careful when deleting files from your system. When in doubt, it’s always a good idea to back up your important files or consult with a professional.
What Happens if I Delete Temporary Files in Windows 7?
Deleting temporary files can free up disk space and sometimes improve system performance. Generally:
- It’s safe to delete temporary files that aren’t in use.
- Programs running in the background might be using some temp files, so it’s advisable to close all applications before cleaning the temp folder.
- Windows will not allow you to delete files currently in use.
Why is My Temporary Files Folder So Big?
Over time, as you use your computer, applications and system processes keep adding files to the Temporary Folder. If not regularly cleaned, these files can accumulate, consuming a significant amount of disk space. Factors contributing to a bloated temp folder include:
- Frequent software installations or updates.
- Prolonged system uptime without regular maintenance.
- Software crashes that prevent temp files from being deleted automatically.
How Do I Clean My Temp Folder?
To clean the Temporary Folder in Windows 7:
- Close all running applications.
- Press
Windows + R, type%temp%, and press Enter. - Select all files and folders (Ctrl + A) and delete (Del key). If prompted, skip the files that are in use.
Alternatively, you can use built-in utilities like “Disk Cleanup” or third-party software to clean up temporary files and other junk.
Benefits of the Temporary Folder
- Efficiency: Applications can store interim data without using main memory, ensuring smoother operations.
- Recovery: In case of crashes, some applications use temp files to recover unsaved data.
- System Operations: Windows uses temporary files for tasks like software installation, updates, or system backups.
Is Temporary Folder Safe?
While the Temporary Folder itself is a legitimate and essential part of Windows, its nature means it can be exploited:
- Malware: Some malware might disguise itself as a temp file, making it essential to have a good antivirus solution.
- Privacy Concerns: Temp files might contain sensitive or personal information, making it crucial to clean them regularly, especially on shared computers.
In conclusion
Understanding the location and management of temporary files is crucial for effective storage management and system performance optimization in Windows. This guide serves as a stepping stone towards a better understanding of temporary files in different Windows versions, including Windows 7, 8, and 10.
The Temporary Folder in Windows 7 is an integral component of the operating system’s efficiency. While it offers numerous benefits, it’s crucial to maintain it regularly to ensure optimal system performance, safety, and to keep disk space in check.
Regularly monitoring and cleaning the temp folder can help in ensuring a smoother and faster computing experience.


 Error")


