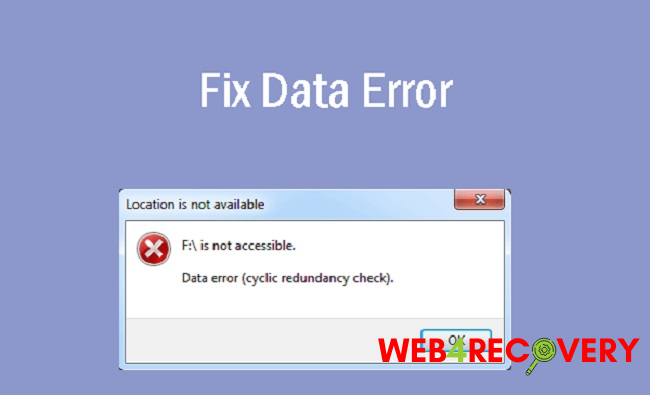
Your computer’s hard disc, an external hard drive, or a USB flash drive are all reliable options for transferring or saving your important data. But occasionally you may get a “Data Error Cyclic Redundancy Check” error when using one of these discs.
When attempting to transfer data between the two devices, you will see the following notice. You may have, for instance, attempted to copy some information to or from a USB drive.
If you are copying files to or from an external drive and then unplug the device, you may get this notice. This problem can also arise when users are merely attempting to save files to their computers.
Method 1: The Chkdsk:
Windows includes its own disc inspection tool called Chkdsk (pronounced as check disc). The primary function is exactly as its name suggests: testing the integrity of your hard drives.
An advantage of this utility is that it can repair disc faults as well as check for them. So, the first item that should be on your to-do list is to run a chkdsk on your drive. It is necessary to give the drive letter before chkdsk may be executed.
The drive letter should correspond to the device you wish to inspect, be it a flash drive, an external hard disc, or your primary hard drive. Whether you need to verify the primary or secondary drive is entirely dependent on the specifics of your circumstance.
Examine the external drive first if you suspect it is malfunctioning. Unless you have concrete evidence that your primary hard drive is deteriorating, however, you should start by checking the external drive.
We are recommended checking your external drive first because verifying and then resolving the issues takes time. There’s no point in spending hours troubleshooting your hard disc if the solution might have been found in a matter of minutes by using a USB drive.
Here is how to do a diagnostic test on the device of your choice.
- To initiate Windows, press the Windows key once.
- In the search box, type “command prompt.”
- After locating Command Prompt via search, right-click it and select “Run this programme as an administrator.”
- Then, hit Enter after typing chkdsk C: /f. In this case, “C” should be replaced with the letter of your hard drive. To bring up File Explorer, just keep the Windows key depressed and press the letter E. The drive’s letter should appear in that location.
- When this appears, do the following: Because the volume is being used by some other process, Chkdsk cannot be executed. Do you want to have this volume inspected after the next system restart? After selecting “(Y/N)”, enter “Y” and click Enter.
- Let things run its course for the time being.
Upon completion, the disc check’s results will be displayed. This should fix the problem, but if it doesn’t or if you get an error message, execute chkdsk before Windows starts up again.
These are the pre-login chkdsk procedures that must be followed.
- Insert the installation disc or plug in the USB drive for recovery.
- Simply restart your device.
- When prompted, press any key. For device booting, press any key.
- If that isn’t specified, you may need to alter the boot order in the BIOS. Follow the instructions below to accomplish that.
- When the computer’s manufacturer’s logo appears after a restart, hit Esc, F8, F12, or F10. When the manufacturer’s emblem appears, you can also glance to the screen’s corner to see what button you need to push. From maker to maker, the button’s design varies.
- Select the Boot options or the BIOS setup utility after pressing the button. This could be different depending on the maker.
- A menu with several options to chose from will appear if you select Boot. Choose to boot from USB (or CD/DVD, if applicable).
- Using the arrow keys, navigate to the Boot section of the BIOS Setup.
- Make sure that your USB recovery disc is listed first in the Boot order menu.
- You should save your changes and then restart your computer.
5. Just hit any key when prompted. To begin the device boot process, press any key.
6. The layout of your keyboard can be selected.
7. Pick your preferred language, time zone, and input method.
8. What’s Next?
9. If you’re having trouble with Windows installation, you can choose to repair your PC from the Install Windows page.
10. Click If you’re using Windows 7, skip to step 13 and open a command prompt.
11. Select More In-Depth Settings
12. A Command Prompt window will pop up.
13. Just hit the enter key after typing chkdsk /r C:.
If there were any problems with your drive, this check should have fixed them. When the scan is done, open Windows and see if the problem still exists.
Method 2: Use the Disk Utilities Check
My Computer also provides access to Windows’s built-in Check Disk Utility. If you’ve ever used Chkdsk before, you’ll find that this is a breeze in comparison. Here are the directives for operating this tool.
- Keeping the Windows key depressed, hit E
- Ideally, the various discs would be displayed. Select Properties from the right-click menu after selecting the desired disc drive.
- Select the “Tools” menu item
- In the Error Checking section, select Check.
- Click Start if a new window pops up, and then choose the box labelled Automatically correct file system issues.


 Error")


