Users are all too familiar with the 0x80004005 issue, as it can arise in a wide variety of contexts.
In most cases, you will encounter this error when performing a Windows update, removing, copying, or extracting a folder or file, installing an application, updating a Microsoft Store programme, or accessing a shared folder or file over a network.
How Can I Resolve the Windows Update Problem 0x80004005?
This problem usually occurs when attempting to upgrade to the newest version of Windows. There might be various causes for Windows update failures, but faulty files are the most common. As a result, we’ve included steps you can take to correct this issue.
Get the Windows Update by Hand
Try installing the Windows update that causes the error before attempting to resolve the problem. Every Windows error has its own unique root cause. A Windows update downloaded via the Microsoft store will not have any problems.
The Microsoft Catalog is an online shop that sells all available Windows updates. Following these instructions will allow you to access Microsoft’s update catalogue and download and install Windows updates:
- A Windows update can be obtained by
- Try to identify the Windows update that may have caused the issue.
- Once you’ve determined the correct update for your system’s architecture, click the Download button.
- After downloading, double-click the update file to begin the installation process.
- You should be able to ignore the problem until your computer restarts.
Initiate the Windows Update Diagnostic Tool.
Furthermore, the Windows Update Troubleshooter can be used to resolve this issue. For the convenience of their users, developers often provide troubleshooters that may be used to rectify a variety of issues.
A user can use this automated tool to verify the integrity of the Windows Update registry keys, restart the Windows Update services, and detect any pending restarts. Whenever an issue is found, the user is prompted to correct it by selecting the appropriate menu item.
- Just right-click on the Start button, and then pick Settings from the menu that appears.
- Next, head on over to Update and Security.
- Pick Troubleshoot from the menu on the left.
- Then, to access the troubleshooters, select Additional troubleshooters.
- Choose to install the Windows update.
- Follow that by selecting the option to Start the diagnostic tool.
- If the troubleshooter finds a problem, you can correct it by pressing the appropriate button.
- When you’re done, you may see if the Windows update fixed the problem by trying it out.
Empty the programme distribution folder
Since it holds the files obtained using the built-in Windows update programme, clearing a software distribution folder is one of the best ways to repair Windows update issues.
It’s likely that this problem was caused by Windows update files becoming corrupted while being downloaded. To rectify this issue, uninstall the Windows update and reinstall it per the instructions provided.
- Select Start Menu to delete the installation directory.
- Start by searching for “Command Prompt” in Windows’s search box.
- In order to run the command prompt with administrative privileges, right-click it.
- To disable Windows Update, open a command prompt and then paste the following commands into the terminal.
- net stop wuauserv
- net stop bits
5. Follow it up by using the Win + R keys to bring up the Run Window.
6. To access the programme installation directory, copy the following path and press Enter.
7. Select everything in the software distribution folder and click the arrow.
8. To delete the software distribution directory, use the Delete key.
9. When you’re ready, cut and paste the following commands to activate Windows Update.
- net start wuauserv
- net start bits
10. To upgrade Windows, head to its settings menu.
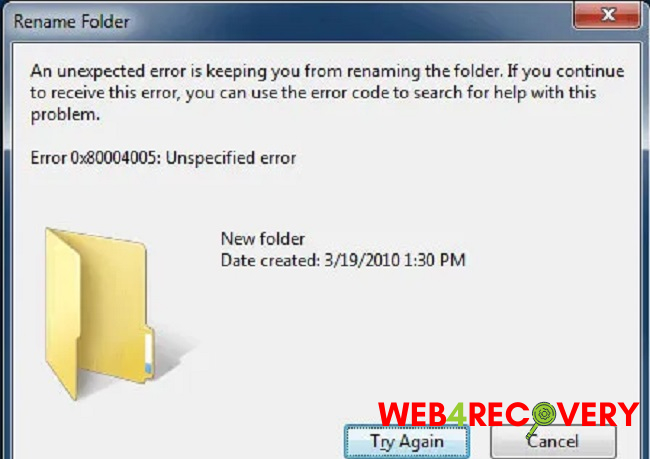
Problems with file extraction, renaming, or erasing?
If this issue occurs while extracting, removing, or transferring the files and folders, you may need to change the working directory.
It’s possible Windows is oblivious to the fact that the folder you’re trying to extract is password-protected because of incorrect permissions. The following procedures should be used to rectify the situation.
You can modify the access settings.
Most of the time, this is because of a lack of administrative privileges for the folder in question. To gain complete access to the folder, you will need to modify the permissions. To adjust the security settings, do as follows:
- Folder permissions can be adjusted by right-clicking on the folder and selecting Properties.
- After that, select your username in the list of groups and users under Security.
- The next step is to verify your administrative privileges within the folder. If you don’t have full access, go to Edit and choose that option. in order to acquire access to the folder’s permissions. When you look under Group or user names, you won’t find your local account. Click Advanced to see if you can add it.
- Just select the option to make a modification.
- Fill in your login for your local account.
- Choose a password, and then hit the Check Names button to create a local account.
- Then select OK to create a user account for local use.
- After that, select Add to grant these privileges to the current local user.
- Then, choose an administrator from the menu at the top.
- Back in the login screen for the local account.
- If you’re sure about the names you entered, select Check Names and confirm with OK.
- To gain access to the folder from your local user account, select Full Control and then click OK.
- Next, select Apply, and finally, OK.
In order to access the file, you will need archive software.
You may get this error message. If Windows doesn’t tell you that the folder or file you’re trying to access requires a password. Downloading archive software like WinRar or 7-Zip to extract the folder would resolve this problem. To extract the file using archive software, please follow these steps:
- Get WinRar or 7-zip.
- Just download it after it’s finished and install it on your PC.
- Then, select the folder you wish to extract by right-clicking it.
- Click the Extract to Folder option.
- Test to see if the problem still exists afterward.


 Error")


