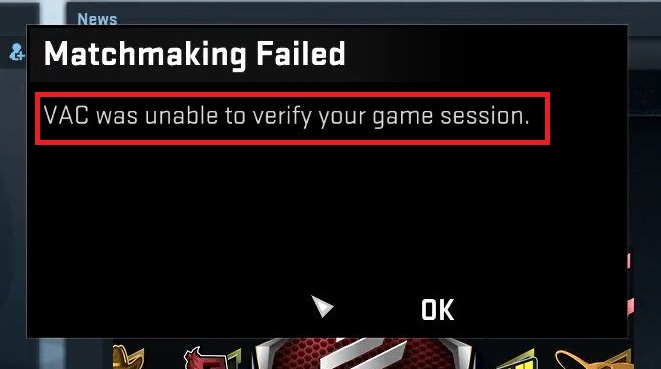
Is the VAC Was Unable to Verify the Game Session Error interrupting your gaming time? No need to worry anymore! We have an article right here to solve your gaming problem specifically. Let’s begin by understanding the VAC verification error and the root cause behind it. VAC stands for the Valve Anti-Cheat System. VAC was developed with the main purpose to detect modified installation files or configuration files.
The valve anti-cheat system is built up to prevent malicious users from exploiting workarounds and achieving an unfair advantage while playing some of the most popular games such as Counter-Strike: Global Offensive, etc. There is a possibility that the VAC may generate a false positive error.
Easy Ways to Fix Solve VAC Was Unable To Verify The Game Session Error
Method 1: Log Out of Steam And Log In Again
One of the reasons behind the VAC error popping up can be the configuration files that have been altered by the operating system or the file management system of your computer. You can get rid of this issue by just logging out of the steam account and then logging in again. All the configuration files will be recreated when you log in with the same credentials.
Follow the steps given below to log out and log in again:
Step 1 – First of all, click on the Steam icon in the taskbar or the Start Menu to Run the Steam Application.
Step 2 – Now, click on your Profile Name on the title bar. A drop-down menu will appear. Click on the Log out of My Account option and follow the instructions or the dialogue box.
Step 3 – Later, log in again with your credentials. In case you forgot your password, click on Forgot Password option to reset your password.
If the error is fixed, it was due to some bad configuration or settings files. Also, re-installing the game will not solve the issue permanently as the game will be loaded with same files again. Hence, it will not be able to solve the error. Similarly, reinstalling steam will not be able to solve the error too.e
In case the error notification still pops up try the next method.
Method 2: Just Reboot Your Computer
Sometime, few of the files that need to be verified by the VAC are being accessed by some other application like the antivirus, etc. It will thus deny access to the VAC to avoid read-write conflicts. This can lead to the ‘VAC was unable to verify the game session’ error. Rebooting the system can solve the error in this case.
Follow the steps given below to reboot your computer system:
Step 1 – Firstly, press the Windows Key on your Keyboard.
Step 2 – The Start menu will appear. Click on the power button and select Reboot option. Make sure to close all the running applications and save all the respective data before performing the reboot of the system.
Open your game to check if you can start the game session without the error notification popping up again. In case the VAC Was Unable to Verify the Game Session error pops up again, try the next method.
Method 3: Verify Integrity of The Game Files
The reason behind the VAC was unable to verify the game Session error could be the corrupted or modified files. You need to check the integrity of the game files to verify they are similar as stated by the manufacturer.
Follow the steps given below to check the integrity of the game files manually:
Step 1 – First of all, Open Steam.
Step 2 – Then, go to the Library Tab and find the installed games on your device there.
Step 3 – Now, right click on the game where the VAC error was popping up. Then, choose ‘properties’.
Step 4 – Then, click on the Verify Integrity of the Game files option in the local tab. The process will take some time to be completed.
Check for the error again once the process is done. If the error still pops up try the next fix.
Method 4: Repair The Steam Client
The problem could be with the steam client itself. There is a possibility that it may have some broken or damaged files leading to the VAC error. Repairing the steam is the most prominent solution in this case.
Follow the steps given below to repair the steam client:
Step 1 – Press the Windows Key and R together to open the run command dialogue box.
Step 2 – Type CMD in the run command dialogue box and press enter.
Step 3 – The command prompt will appear. Then, type ‘C:\Program Files (x86)\Steam\bin\SteamService.exe /repair’ and press enter.
Step 4 – Check the path to the SteamService.exe in your system. If the path is different in your system, replace it with the path of your SteamService.exe
Step 5 – Once the repair is complete restart your computer system.
Try to open the steam app first, it may reconfigure itself or download some files for update or configuration. You might need to log in again. Then, check for the error again.
If the error is still prevalent try the next method.
Method 5: Exclude Game Directory From Antivirus Scan
One of the reasons behind the VAC Was Unable to Verify the Game Session error can be your antivirus. There is a possibility that your antivirus may be trying to scan the game directory in the background.
In this case you should try white-listing the game and steam directory such that they are not scanned automatically by the antivirus. The process is different for different anti-virus programs but easy enough for you to figure out on your own.
It will be closely similar to the steps given below:
Step 1 – Launch your antivirus program from the desktop or the start menu.
Step 2 – Go to the Settings option. Then, add game directory in the excluded folders list.
Conclusion
Hopefully, one of the five methods mentioned above were able to solve the VAC Was Unable to Verify the Game Session error. In case you were using any modifications or enhancements to cheat, you need to stop that immediately as you will be unable to do any matchmaking further. Also, you may get blocked sooner or later. Then, you will not be able to recover your progress or any data ever.
So it is for your own good to avoid such unethical techniques. However, if you are not pulling any of such dirty techniques, you can try one of the quick methods mentioned above to avoid the VAC Was Unable to Verify the Game Session error. You can go back to enjoying your interruption free online game session and official matchmaking.


 Error")


