DNS_Probe_Finished_No_Internet Error: Irritated without proper internet, we have got some solutions for your DNS errors! Let’s start with a little understanding of DNS. DNS aka Domain Name Servers are like the internet’s phonebook responsible for loading web pages from the host.
Sometimes, your browser may not be able to connect to the host as a result of DNS errors making it impossible for you to access the internet.
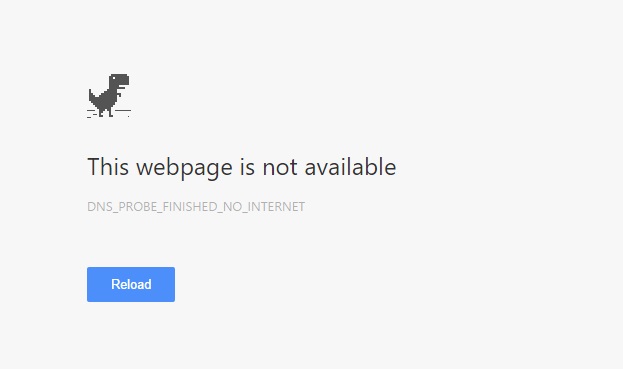
Most of us have experienced that momentary panic when a web page fails to load, displaying an error message instead. Among these errors, “DNS_Probe_Finished_No_Internet” is notably frequent for Chrome users.
This article delves deep into this error, its common causes, and ways to enhance internet speed using Domain Name System (DNS) settings.
What is DNS_Probe_Finished_No_Internet?
The “DNS_Probe_Finished_No_Internet” error occurs when your browser cannot connect to the internet due to a DNS resolution failure. The Domain Name System (DNS) is the phonebook of the internet.
It translates human-friendly URLs, like “www.example.com,” into IP addresses that computers use to identify each other on the network. When DNS fails to translate a domain name, this error pops up.
Causes of “DNS_Probe_Finished_No_Internet” in Chrome
Several factors can lead to this error:
- Unresponsive DNS Server: Sometimes, the DNS servers set by your ISP may not respond quickly or might be temporarily down.
- Corrupted or Outdated DNS Cache: Over time, your computer stores the IP addresses of websites you visit. If this cache becomes outdated or corrupted, it might lead to the error.
- Network Issues: General problems with your network connection can cause this error. This includes issues with routers, modems, or the devices you’re using.
- Firewall or Antivirus Interference: Occasionally, security software might mistakenly block your browser’s access to the internet.
Ways to Fix DNS_Probe_Finished_No_Internet in Chrome
Don’t worry and try out some of the quick fixes below to solve DNS_Probe_Finished_No_Internet Error in Chrome.
Method 1: Change Your Antivirus or Firewall Settings
Let’s begin with changing your antivirus or firewall settings.
Step 1: Open the windows firewall from the start menu. Windows firewall permits entry to certain programs only and blocks the other programs. There is a possibility that your browser is blocked by the firewall.
Step 2: Go to change settings and check if your browser is blocked. In case it is blocked, select the browser and click OK to permit entry. Similarly, in case your system has any additional antivirus program installed check for your browser’s entry. Follow the same steps if entry is blocked.
Step 3: Once the browser’s entry is allowed to shut down your computer and restart your system.
In case the problem is still prevalent try the next fix to solve your issue.
Method 2: Use Command Prompt
Under this method, we will use the command prompt feature to solve your problem.
Step 1: Open the command prompt from the start menu.
Step 2: Once opened, it will display many options. Choose run as administrator and then select command prompt (admin).
Step 3: Write “netsh winsock reset” in the command prompt admin tab and close it.
Step 4: Shut down and reboot your system.
If the method still is unable to solve your problem, then try the next fix.
Method 3: Reinstall your browser
It is possible that the browser has a problem. Try reinstalling your browser by following the steps given below:
Step 1: Open the control panel from the start menu.
Step 2: Select “uninstall a program” option under programs.
Step 3: Right-click on your browser and click on the uninstall option.
Step 4: After uninstalling the browser successfully, download the browser again and reinstall it.
In case the problem is still prevalent try the next fix to solve your issue.
Method 4: Change DNS Address
Maybe it was the DNS causing all these troubles so let’s try changing the DNS only.
Step 1: Open the control panel from the start menu.
Step 2: Click on the network and internet option.
Step 3: Now, click on the network and sharing centre option.
Step 4: Under it, click on the view network status option.
Step 5: Select change adapter settings.
Step 6: Then, right-click on your wireless connection and select the properties option.
Step 7: Search for the internet protocol version 4 and click on it to find the properties option.
Step 8: Now click on use the following DNS server addresses. Close your browser and launch it again to check if the internet connection is working properly again.
In case the issue still arises, try the next fix to solve your issue.
Method 5: Disable DNS Prediction Services or Fix DNS Probe
Follow the given steps to disable DNS prediction services or fixing DNS probe:
Step 1: Go to your browser’s settings. Find the advanced settings option and click on it.
Step 2: Search for use prediction services to load the pages more quickly option. Uncheck that box.
Step 3: Restart your computer.
In case the problem is still prevalent try the next fix to solve your issue.
Method 6: Clear The Cache of Your browser
Sometimes too much-cached data on your browser may cause your browser to stop working. Try clearing the cache off of your browser by following the steps below:
Step 1: Open the settings tab of your browser.
Step 2: Find the more tools option and click on it.
Step 3: Then click on clear browsing data and choose a preferred time span under it. You can clear your cookies and browsing history too.
Step 4: Close your browser and launch it again.
In case the browser still shows the same error give the next fix a try.
Method 7: Change Your IP Address Using Command Prompt
Follow the given steps to replace your IP address:
Step 1: Open the command prompt from the start menu.
Step 2: Type “inconfig /release” and press enter.
Step 3: Then type “inconfig /renew” and press enter.
Step 4: Remove the DNS by typing “inconfig /flushdns” and press enter.
Step 5: Close the command prompt window and reboot your computer.
In case the problem is still prevalent try the next fix to solve DNS_Probe_Finished_No_Internet issue.
Method 8: Uninstall Web Monitoring or Any Filter Application
Sometimes the website filters or web monitoring applications installed on your computer systems may be the reason behind the troubles. In that case, you must uninstall it to check if it was the cause of the problem.
Disable them and check if your internet connection works now or not and open the sites which were showing the error before. If the internet works smoothly now, the problem is fixed and if not, then try the next fix.
Method 9: Update Your Drivers
Old and outdated drivers can cause the DNS_Probe_Finished_No_Internet error too. We will try updating our drivers in this step.
Step 1: Press the Windows logo key and R together to open the run dialog box. Open the device manager by typing devmgmt.msc in the run dialog box.
Step 2: Find the networks adapter feature in the device manager window and click on it. The list of active adapters will be displayed.
Step 3: Right-click on the one active in your computer and select update driver software option.
Step 4: Once the driver is updated, try reconnecting to the internet again.
In case the problem is still prevalent give troubleshooting a try.
Method 10: Reboot, Reset or Change Settings of Your Router or Modem.
Step 1: If the error is occurring only in a particular browser, try using a different browser. If the problem still persists try uninstalling and reinstalling the same browser.
Step 2: If the problem still exists and your entire computer can’t access the Internet, including browsers, apps, or e-mail, then you should try to reboot, reset your router or modem or change its settings.
Step 3: Try unplugging the power cable of your router or modem away from the source of energy and wait for at least five minutes. Then plug the cable into your router or modem again and check for the internet connection.
If the internet connection is back, Bingo! The problem is solved. However, in case you still face any problems contact the respected technical support.
How to Increase Internet Speed Using DNS
Using a reliable DNS can significantly boost your internet speed. Here’s how:
- Switch to a Faster DNS Server: Instead of using the default DNS servers provided by your ISP, you can switch to faster, public DNS servers like Google DNS (8.8.8.8 and 8.8.4.4) or Cloudflare’s 1.1.1.1.
- Regularly Flush DNS Cache: Periodically flushing your DNS cache ensures that your computer always fetches the latest address information. On Windows, use the command
ipconfig /flushdns.
Manually Fixing the DNS Issue
If you’re facing the “DNS_Probe_Finished_No_Internet” error, here are some steps you can take:
- Change DNS Servers: Go to your device’s network settings and manually enter preferred and alternate DNS addresses.
- Flush DNS Cache: On Windows, open Command Prompt as an administrator and type in
ipconfig /flushdnsand press Enter. - Restart Router or Modem: A simple restart can solve minor glitches. Disconnect the power supply, wait for a few seconds, and reconnect.
- Check Firewall and Antivirus Settings: Ensure that your security software is not blocking Chrome’s access to the internet. If required, add Chrome to the list of allowed programs.
- Reset Chrome’s Flags: Type “chrome://flags/” in the address bar, click on “Reset all to default,” and restart the browser.
Conclusion
Hopefully, one of these fixes will solve DNS_Probe_Finished_No_Internet error, and you can once again enjoy a smooth and fast internet connection.
While “DNS_Probe_Finished_No_Internet” is a common error, understanding its causes and potential solutions ensures a smoother browsing experience.
By optimizing DNS settings, not only can you potentially resolve this issue, but you can also improve your overall internet speed. Regularly updating your DNS and flushing the cache can make a noticeable difference in your online experience.


 Error")


